You need to have permission to edit products to perform bulk operations.
Managed roles having access: System admin, PIM admin and PIM write.
Change product status Export Edit categories
Create variant group Add/remove labels Add task
Edit attributes Edit attributes with preview
Overview
Once you've finished establishing your data model and imported products into your catalogs, you can process multiple products simultaneously by utilizing bulk actions. These features allow you to make changes efficiently, saving valuable time and effort.
Bulk actions are made available in the menu above the Products grid once you have selected relevant products.
Tip! Please see Find relevant products for information on how to utilize the Basic filters or Query builder to locate the products in question.

Change product status
You can easily change the product status of a set of products across multiple contexts in a single operation.
- Select the products you want to change the status of.
- Click Change status from the action menu, and select the status you want to update the products to.

- The following window is presented:

- The currently selected context is presented. Optionally select more/other Contexts to apply the status change for.
- Click Change status to perform the operation.
Export
- Select the products you want to export.
- Click the Export option.
- In the pop-up presented, specify the Export file name and Context.
- Select whether data should be exported in CSV or XLSX format.
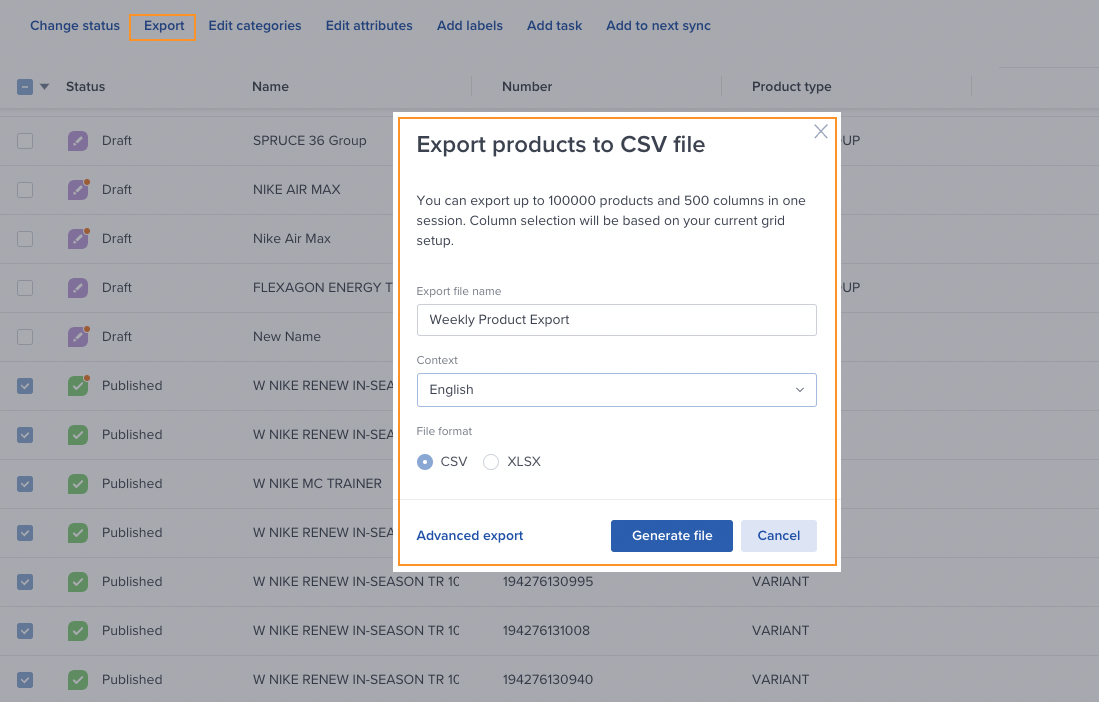
- Click Generate file to start the export.
- When the export is completed, you can Download the file immediately. Optionally select to Close and download later.
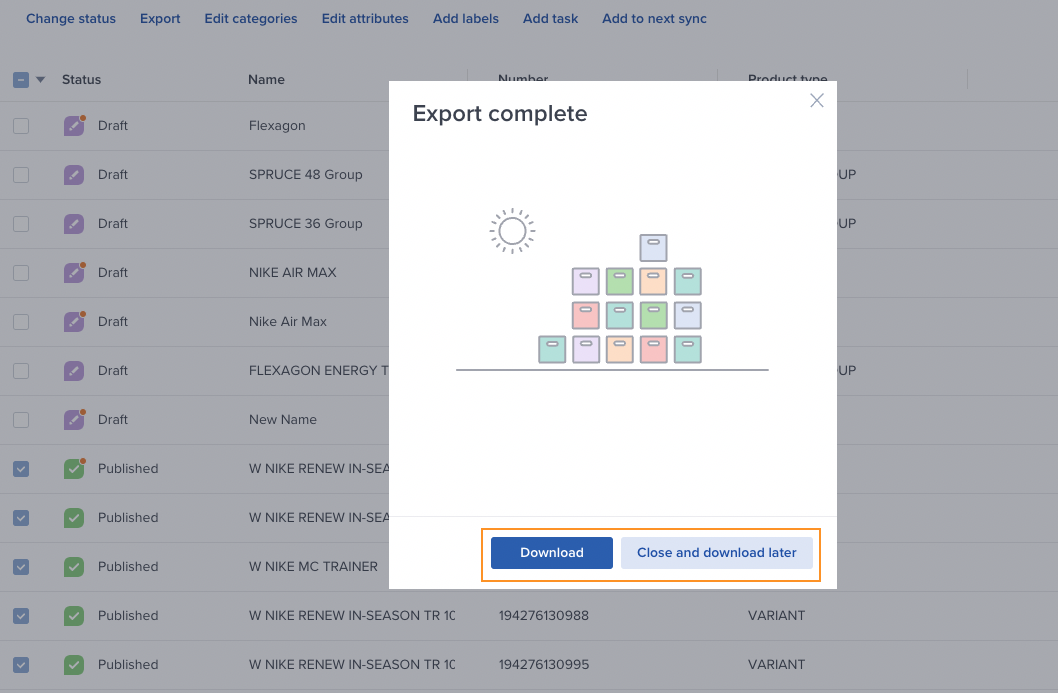
- If you selected to download the file later, you can go to the Export page to find the file at a later stage. Hover over the relevant export job, click the 3-dots menu on the right and select Download file.
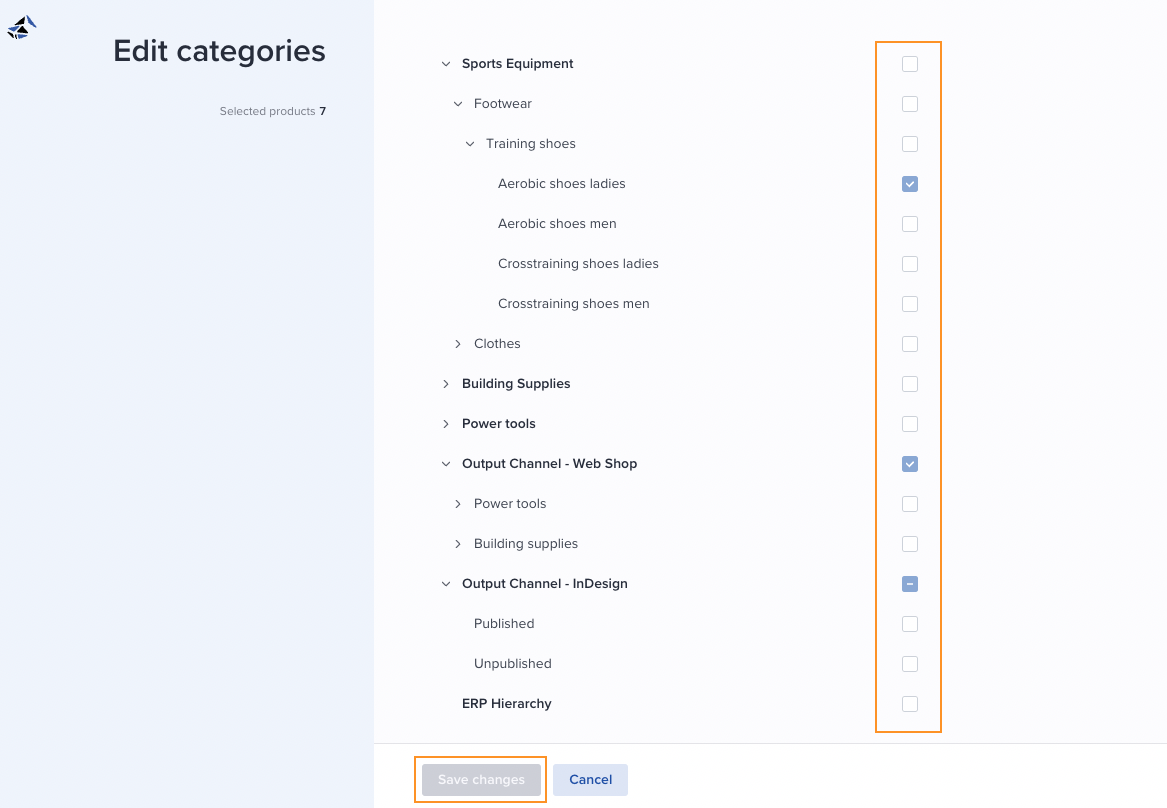
Edit categories
- Select the products you want to re-assign categories on.
- Click on the Edit categories option; the existing categories will be shown with a dash icon, and new updates will be shown with a checkmark.
- Click on Save Changes to update the changes to the selected products.
Tip! If you have multiple catalogs structures for different consuming channels, products can be in multiple catalogs.
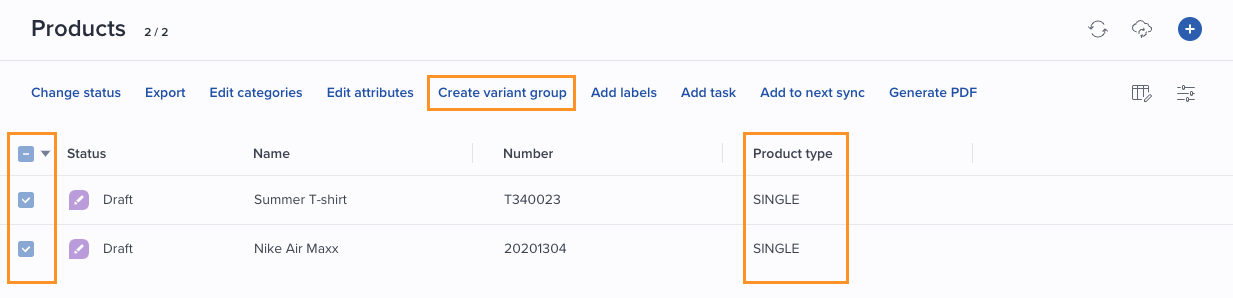
Create variant group
You can use this bulk operation to create a new variant group consisting of a selected set of variants.
Do the following:
- Select the relevant single products from the grid.
- Select Create variant group from the menu above the grid:
- Specify the Group name and Number:
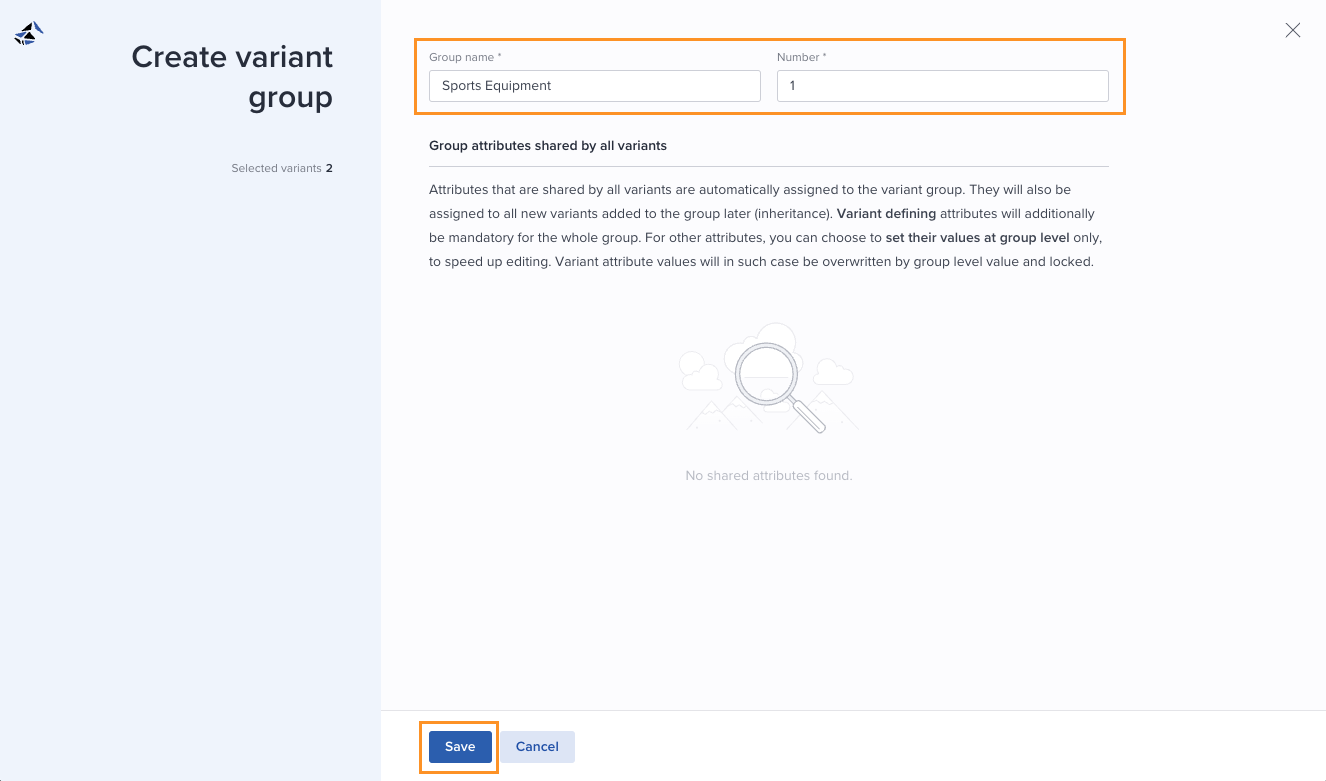
- Click Save.
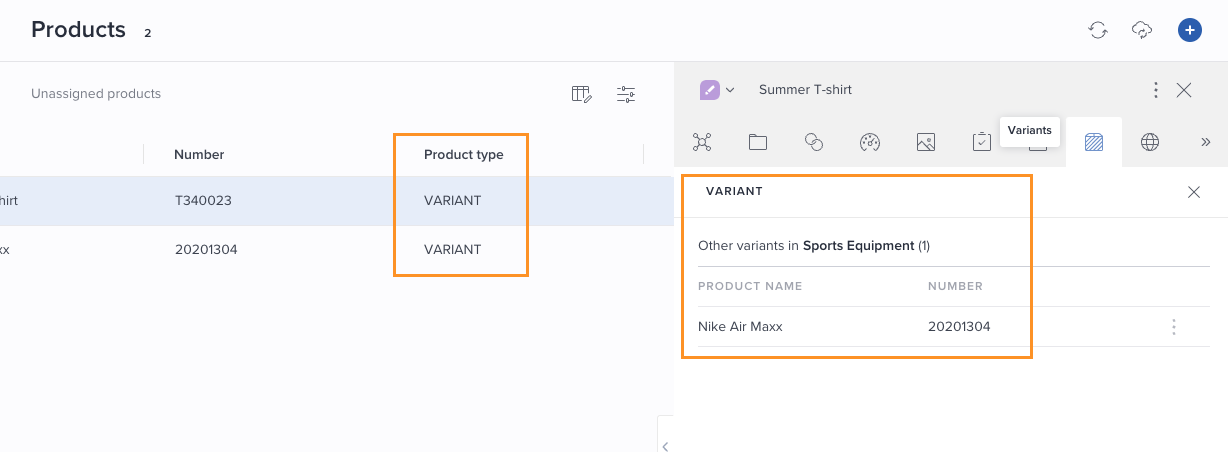
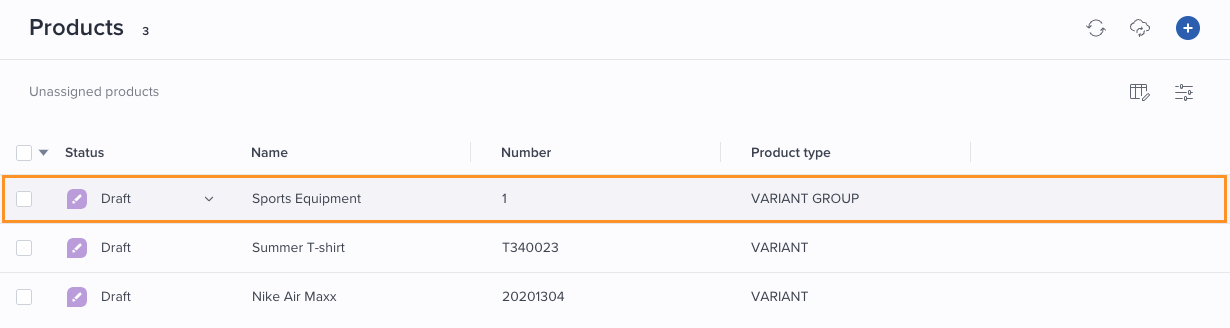
- The variant group will be available in the product grid.
Add/remove product labels
You can add labels to your products for filtering/sorting purposes.
- Select the products you want to edit labels for.
- Select Add labels from the menu:

Any labels already added to one/more of the selected products are presented. - Click the plus icon (Add) to add a label to all selected products.
- Select one/more existing labels or create new ones.

- Optionally remove labels already added to the products by clicking the minus button.
- Click OK when you are done.
Add Task
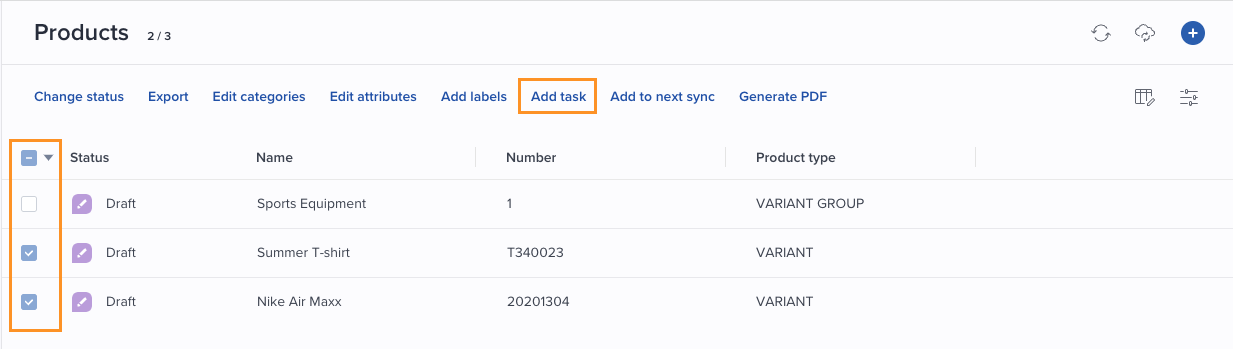
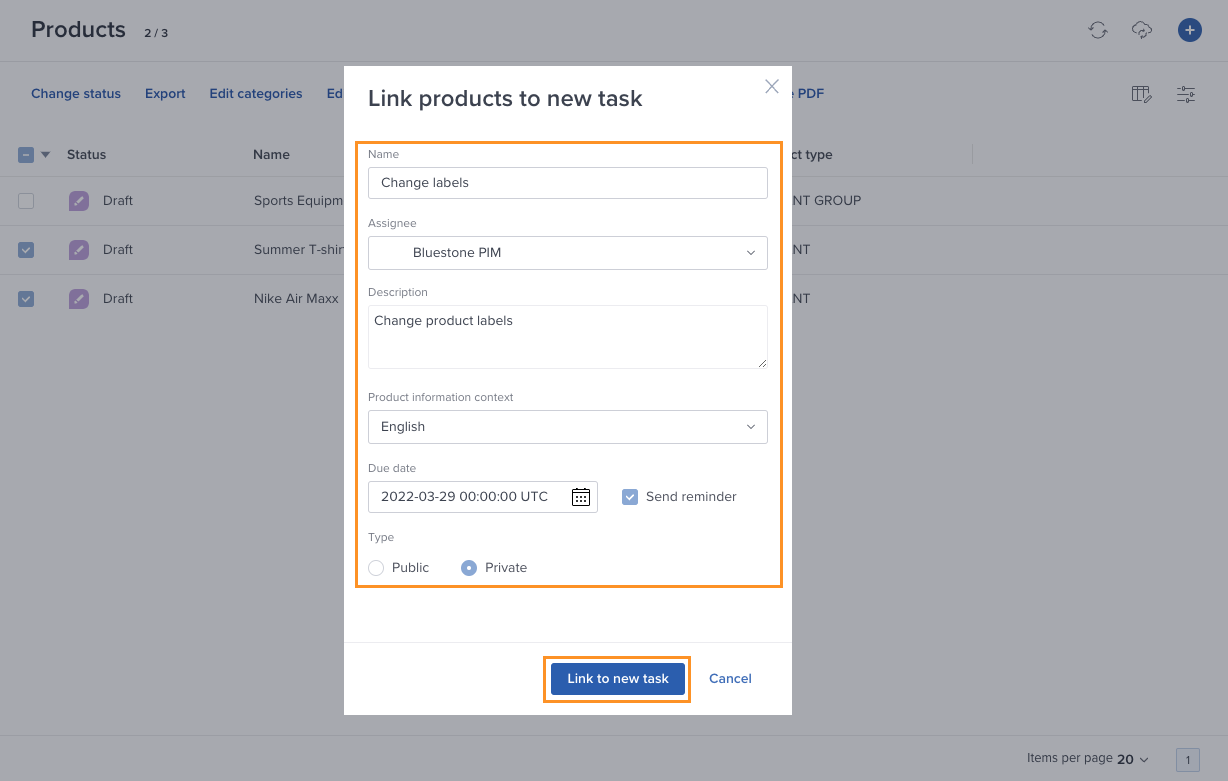
- Select the products you want to link to a new task.
- Select Add task from the menu:
- Enter a name, assignee, description, context, due date, and type of task.
- Then click Link to the new task, and the task will be linked to the products.
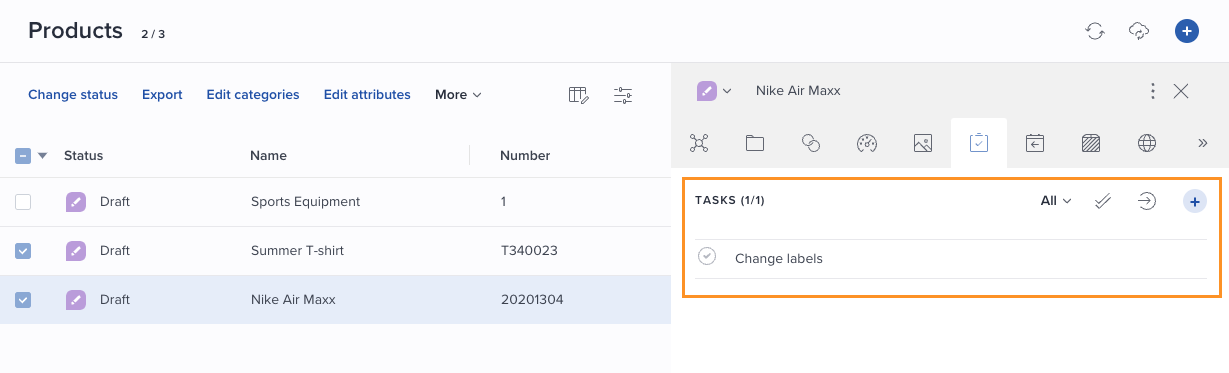
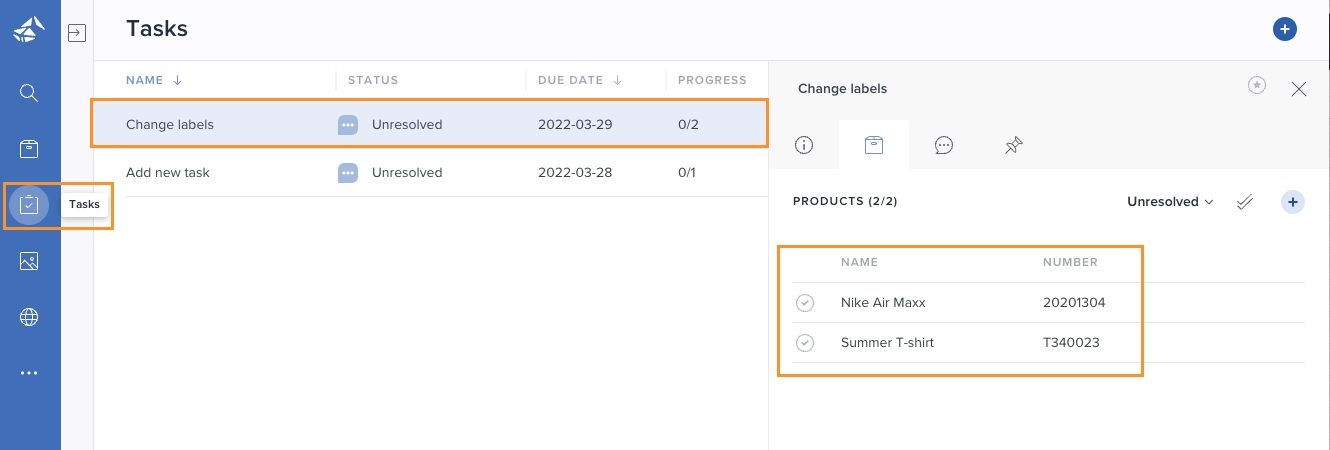
- Find the task on each product panel in the Tasks tab or Tasks in the menu.
Edit attributes
The 'Edit attributes' feature allows you to efficiently add/remove attributes or set/update attribute values to a large number of products at the same time.
Do the following to perform one/more bulk edit operations on a set of products:
- Go to the Products page.
- Select the products to be updated.
Tip! Please see Find relevant products for information on how to utilize the Basic filters or Query builder to locate the products in question.
- Select Edit | Attributes: from the menu above the grid:

The Bulk edit attributes page is presented:
- Click the + icon in the upper right to add an operation.
- Select the relevant attribute. Start typing parts of the attribute name to filter the list.
- Select operation:
- ATTRIBUTE:
- Add attribute
To add the attribute to selected products that do not have it assigned. Optionally, a value can be set at the same time. - Remove attribute
To remove the attribute for all selected products.
- Add attribute
- ATTRIBUTE VALUE:
- Add value to existing
Only applicable to multi-select and dictionary attributes. The operation allows you to add more select values to the currently selected set of values. - Set value
To replace the current attribute value for all selected products where the attribute is assigned. It can also be used to empty any existing values. - Remove value from existing
Only applicable to multi-select and dictionary attributes. The operation allows you to remove some values from the currently selected set of values.
- Add value to existing
- ATTRIBUTE:
- If applicable, specify/select a value (not relevant for 'Remove attribute').
- If applicable, add more operations by clicking the + icon again.
Note! Several operations can be performed on the same set of products, but only one operation per attribute.

- If you added an operation by mistake, remove it by clicking the x icon to the right of the relevant row.
- Click Preview products if you want to ensure that your product selection is correct before applying the changes.
- Click Apply changes to [x] products to execute the operation.
The bulk edit process will now start. It might take a while to finalize, depending on the number of products and operations.
Edit attributes with preview
The 'Edit attributes with preview' feature allows you to update a set of products in bulk, based on information about which attributes are shared between the products.
Note! This functionality is available for a maximum of 100 selected products. For bulk editing of more than 100 products, please see Edit attributes.
Do the following to add, set/edit the value, or remove attributes:
- Select relevant products from the grid:

Tip! See Find relevant products on how to utilize Basic filters and Query builder to find the products in question.
- Select Edit | Attributes with preview from the menu above the grid.
The following page is presented:
The information is divided into the following sections. The number of attributes is presented in parenthesis for each section:
- Assigned to all products
Lists the attributes assigned to all of the selected products. - Assigned to some products
Lists the attributes assigned to some (one or more, but not all) of the selected products. - Other attributes
Lists the attributes not assigned to any of the selected products.
The Value column presents information about attribute values:
- Green icon
The value is equal or not defined for all products with the attribute assigned. The value is presented. - Purple icon
The value is not equal for the products with the attribute assigned. No value is presented.
Tip! At any time you can click Show selected products to view the product name, number, and any image thumbnail of your selected products.
- Assigned to all products
- Optionally use the search function in the upper right corner to filter the listed attributes.
- Click the bulk edit checkbox for the relevant attribute(s):

Note: Any attributes you are not allowed to edit are listed but not available for bulk editing.
- Select operation:
- ATTRIBUTE:
- Add attribute
The operation will add this attribute to the selected products that do not have it assigned.
If relevant, you can set a value at the same time. If the attribute is already shared by some products and the current value is equal, this value is pre-filled. This is especially helpful when adding a text attribute.
If you don't specify a value, the products already having the attribute assigned, will keep their value.Warning! Setting a value will override any existing value for all selected products.
- Remove attribute
Will remove this attribute from the products in your selection.
- Add attribute
- ATTRIBUTE VALUE:
- Add value to existing
Only applicable to multi-select and dictionary attributes. The operation allows you to add more select values to the currently selected set of values.
- Add value to existing
- ATTRIBUTE:
-
-
- Set value
The operation will replace the current value/set value for all selected products where the attribute is assigned. It can also be used to empty any existing values. - Remove value from existing
Only applicable to multi-select and dictionary attributes. The operation allows you to remove some values from the currently selected set of values.
- Set value
-
- When all required operations are set, click Review to verify the product selection and the operations to be performed.
- If you need to make changes, click Edit with preview to go back.
- Click Apply selected actions (x) to start the bulk edit operation.
The bulk operation process is executed immediately.