Filtering using the query builder
View query Preview the query result Save query as view
Filters
You can use filters to find relevant products. Filtering can be done based on specific product information like Name, Number, Attributes, and/or Labels. Multiple criteria can be added to reduce the number of products found.
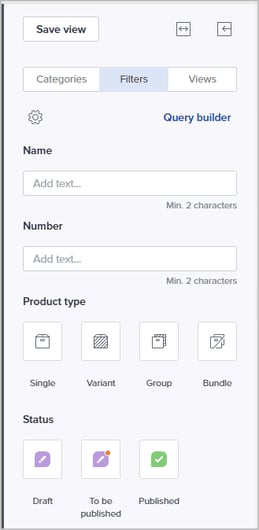
- Click Filters in the left panel.
- The default filter setup includes Name, Number, Product type, Status, Creation date, Last update and Validation issues.
Tip! If you are given access you can configure which fields/options to be shown. See Filters setup on how to do this.
- Add relevant filtering criteria by e.g. adding text in the Name field and selecting two Product types.
Note: A minimum of two characters must be specified for text attribute values.
Filter criteria that you select will be applied immediately, and matching products are presented in the grid.
Tip! If you have applied a filter that can be useful at a later stage, you can save it as a View by clicking Save view and giving it a name. Saved views are available from Views. Please see Create and manage views for details.
Filters setup
You need to be given explicit permission to configure your own Filters setup.
Managed roles having this permission: System Admin, PIM Admin and PIM Write.
If you have the System Admin role, you can also configure the Filters setup for other users and the default setup for all users in your organization.
Do the following to change which fields/attributes to be available in the Filters by default:
- Click the cogwheel icon and select Filters setup:

The following window is presented:
- Select whom to set up the filter for:
- Myself: Will be available for you only.
- Another user: Click the User dropdown to select which user to configure the filter setup for.
- Organization: Will be available as default for all users in your organization. If a user already has a personal setup, the personal setup is used.
- If you want to reset an already configured filter to the default used by the organization, select Reset to default.
- Click Set up to continue. The following page is presented. The currently selected fields/attributes are presented in the right column:

- You can use the search field and/or select the relevant attribute group to find the fields/attributes you want to include. Filtered fields/attributes are listed in the middle column.
- Add a field/attribute to the filter setup by clicking it. Now it's added to the Selected columns section to the right.
Tip 1: Add the Unpublished changes field to easily identify published products having unpublished changes and published products to be unpublished.
Tip 2: Add the Validation issues field to easily identify products that will be omitted in sync due to validation errors.
Tip 3: Add the Variant groups or Bundles field to easily identify products having no/more than/fewer than a given number of linked products.
- Optionally, remove a currently included field/attribute from the filter setup by hovering and clicking the [x] button.
- Change the order of the selected fields/attributes by using drag-n-drop.
- When you are happy with the setup, click Next. The following page is presented:
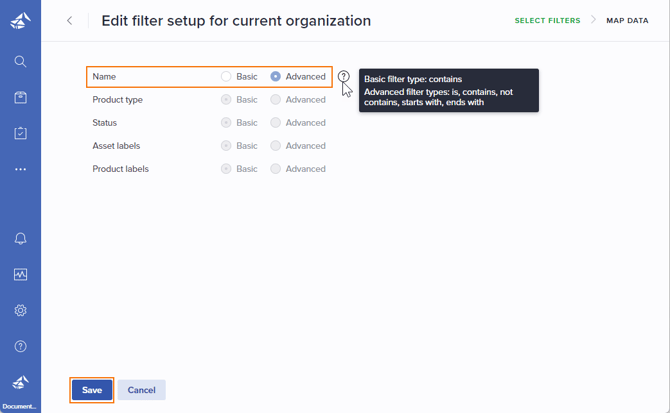
- For some of the filter options, there are advanced filtering operators available.
Select whether to use the Basic or Advanced filter type where this is available. Hover the question mark to see which operators are available for the two types. - Click Save when you are finished.
Note: The system's default filter setup is presented if there is no specific filter configured for the user or organization.
Filtering using the query builder
You can find relevant products by specifying conditions using the Query builder. Do the following:
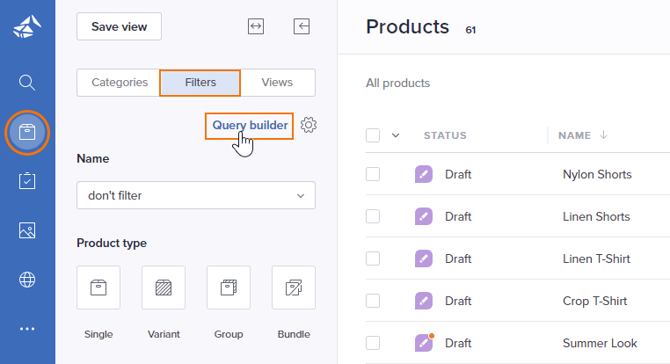
- Go to the Products page.
- Open the Filters section in the left panel.
- Click Query builder:
The following page is presented: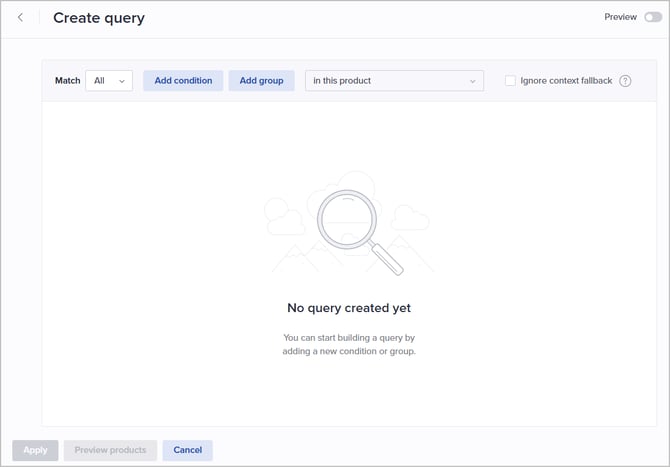
- To find products that have or are missing specific information in a given context, select Ignore context fallback at the top. This ensures that any values from the fallback context are not taken into account.
- Start building your query by adding conditions. Conditions can be 'stand-alone' or connected to a group. Please see the following sections.
Create a stand-alone condition
Follow these steps to build a query consisting of one or more single conditions.
- Click Add condition. The following is presented:

- Select which entity type (e.g. Attribute or Status) to create a condition for. To make it easier to find the relevant entity, start typing to filter the list. In the following, Attribute is used as an example.
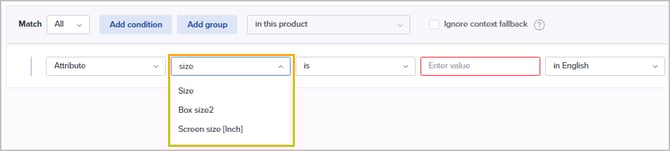
- Select which attribute to filter by. To make it easier to find the relevant attribute, start typing to filter the list:
- Select the operator to be used in your condition. There are different operators available depending on the selected entity. In addition, for Attributes, operators available depend on the type of attribute chosen.

Operator Logic contains the specified string is found not contains the specified string is not found is the specified value matches is not the specified value does not match is assigned to product the specified attribute is assigned is not assigned to product the specified attribute is not assigned between the value is within the specified range is not between the value is not within the specified range greater than the value is greater than the specified value smaller than the value is smaller than the specified value equal or greater than the value is equal to or greater than the specified value equal or smaller than the value is equal to or smaller than the specified value starts with the value begins with the specified string ends with the value ends with the specified string all of these all of the specified values are found none of these none of the specified values are found not all of these all of the specified values are not found some of these one/more of the specified values are found value is defined any value is found value is not defined a value is not found (will also include products where the attribute is not assigned) Date/Date and time specific: last 7/14/30/90 days date/time falls within the specified range (7, 14, 30, or 90 days) prior to the current moment. days ago date/time falls within the user-defined number of days prior to the current moment.
next 7/14/30/90 days date/time falls within the specified range (7, 14, 30, or 90 days) after the current moment. days from now date/time falls within the user-defined number of days following the current moment.
- Specify the value according to what you want to include/exclude, depending on your previous selections:
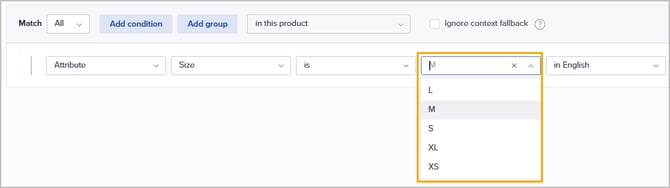
Note: A minimum of two characters must be specified for text attribute values.
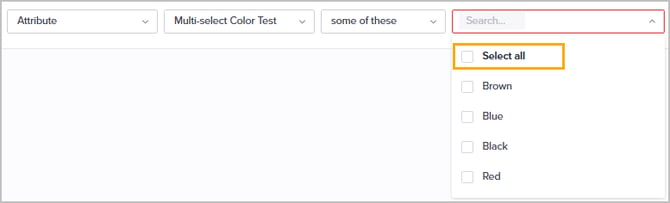
Tip! For multi-select attribute values, you can Select all (optionally filtered) options in one go:
- Select for which context the condition should apply:
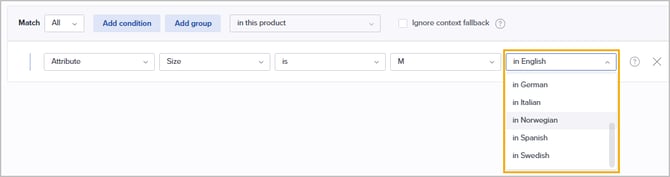
Note! If you need to find products that have or are missing specific information in a given context, select Ignore context fallback at the top. This ensures that any values from the fallback context are not taken into account.
- If you need to add more conditions to your query, click Add condition and repeat the above steps.
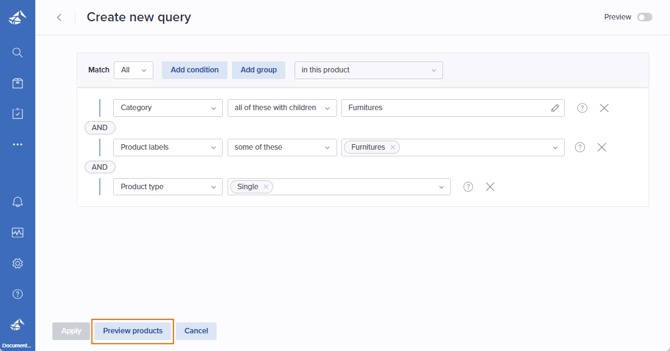
- If you have added more conditions, select whether All or Any (at least one) of the conditions must be fulfilled. In the following example, both conditions must be fulfilled for a product to be returned from the query:

- If your query contains many conditions, you can view it in a textual way by using the Preview toggle. Please see View query for details.
- If you want to preview the products matching the query, click Preview products. Please see Preview the query result for details.
- When you are happy with the query, click Apply.
The products matching the query are presented in the products grid. The query conditions are presented at the top. Example:
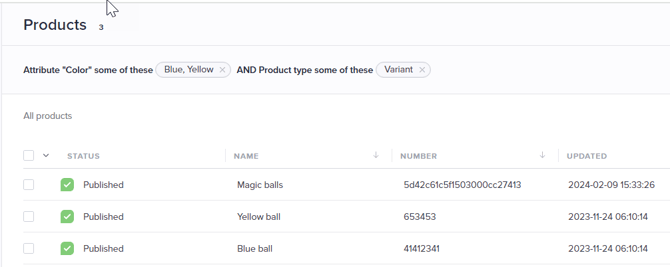
Tip! If you have applied a query that can be useful at a later stage, you can save it as a View by clicking Save view and giving it a name. Saved views are available from Views. Please see Save the query as a view for details.
Create a group of conditions
Follow these steps to build a query consisting of one or more groups of conditions. A group can be located anywhere in your query hierarchy:
- Click Add group to create a group of conditions.
- Select whether All or Any (at least one) of the conditions within the group must be fulfilled.
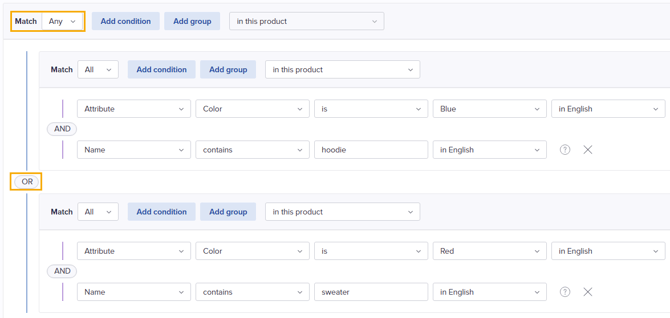
- If you add more groups, also select whether All or Any of the groups of conditions must be fulfilled. In the following example, one of the condition groups must be fulfilled for a product to be returned from the query:
- If your query contains many conditions, you can view it in a textual way by using the Preview toggle. Please see View query for details.
- If you want to preview the products matching the query, click Preview products. Please see Preview the query result for details.
- When you are happy with the query, click Apply.
The products matching the query are presented in the products grid. The query conditions are presented at the top.
Tip! If you have applied a query that can be useful at a later stage, you can save it as a View by clicking Save view and giving it a name. Saved views are available from Views. Please see Save the query as a view for details.
Note: If you apply a basic filter after having applied a query, the query conditions are replaced.
View the query
When you are building or editing a query containing many conditions it might be hard to get an overview. Use the Preview toggle to view your query in a textual way.
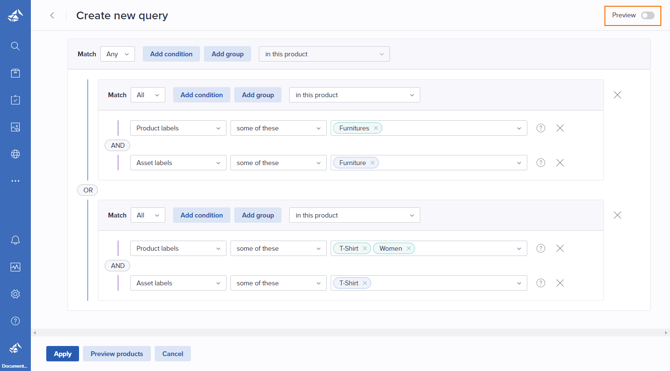
Example of a query in edit mode:
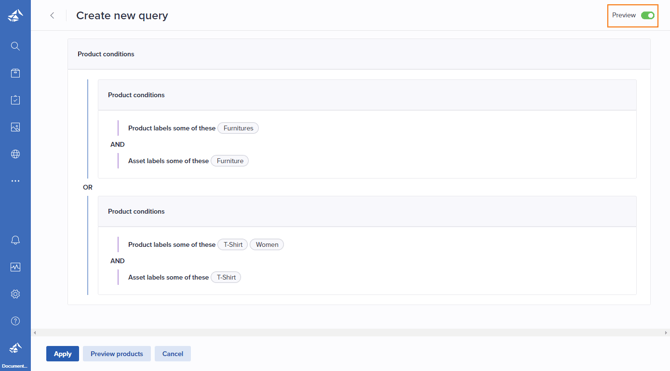
Example of a query in preview mode:
Preview the query result
In the process of building or editing a query, it might be useful to preview/browse through the matching products.
Example of a query in edit mode:
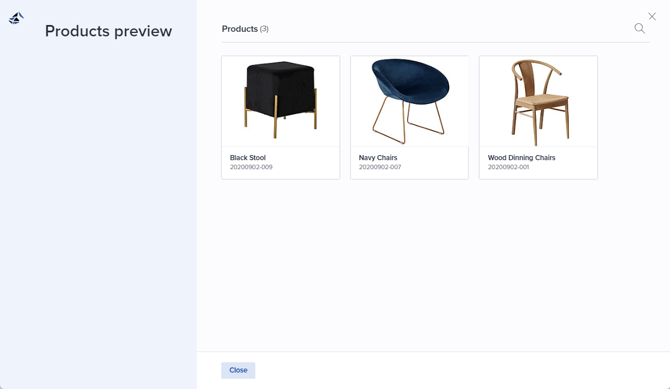
- Click the Preview products button to open a separate page listing the matching products as tiles. The product name and number are presented for each product.
- Optionally click the magnifying glass in the upper right corner to search for specific products.
- Click Close to return to the query builder page.
Save the query as a view
When you have applied a query that will be useful at a later stage, you can save it as a Saved view to avoid building the same query several times.
Do the following:
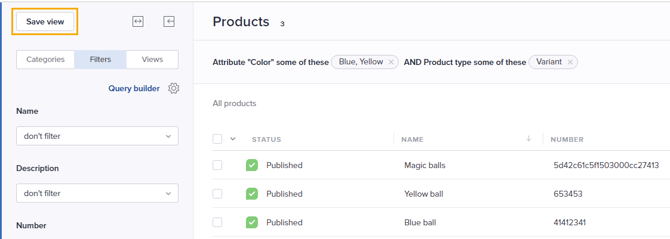
- Click Save view in the upper left corner:
- In the presented window, specify Name etc. for the Saved view. See Create and manage views for details.

- Once the view is saved, it can later be found and loaded from the Views tab:
