You can create and manage views if you have the System Admin, PIM Admin, PIM write or PIM read role.
Share an existing view Set an existing view as default
Overview
If you have applied a filter that will be useful at a later stage, you should save it as a View. This way you don't have to specify the same filtering criteria over and over again.
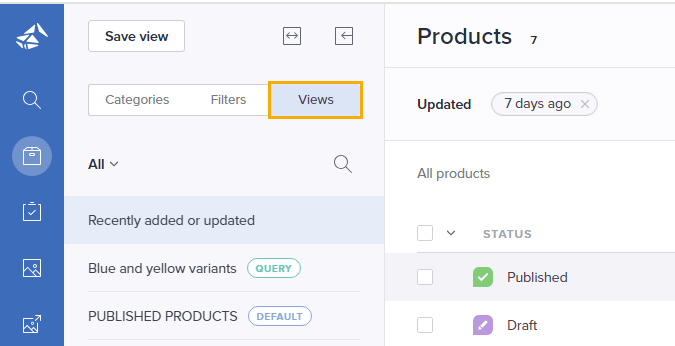
Product saved views made available to you are found by selecting Views from the left panel:
Create a view
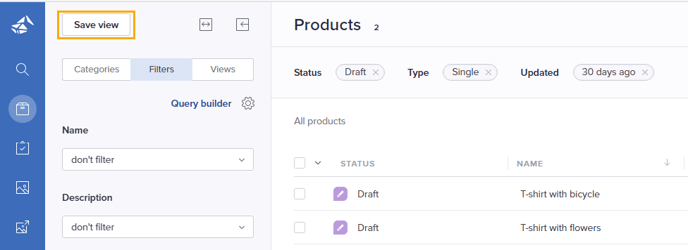
Start by applying a filter using the basic Filters or the Query builder.
Tip: Please see Find relevant products for details on how to use the basic Filters and the Query builder.
Do the following to save your filtering criteria as a View:
- Click Save view in the upper left corner. The following window is presented:

- Specify a Name to be presented in the Views list.
- Select a saved Column setup to be loaded when using this view.
Note: A private column setup cannot be loaded by other users, so such setups should only be selected for private views.
- Select who should be able to utilize this view by selecting one of the following options in the Sharing dropdown:
- Keep view private
Only you will have access to it. - Share with selected users
Select which users should be able to utilize the view, and give each user either View or Edit access.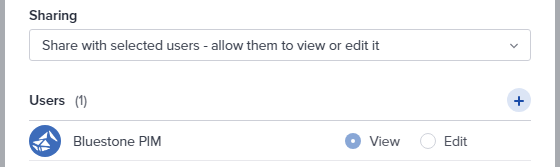
- Make view public
All users in your organization will be able to utilize the view.
- Keep view private
- If you want this view to be loaded by default when opening Products (for each new session), select Set as my default view.
- Click Save when you are done.
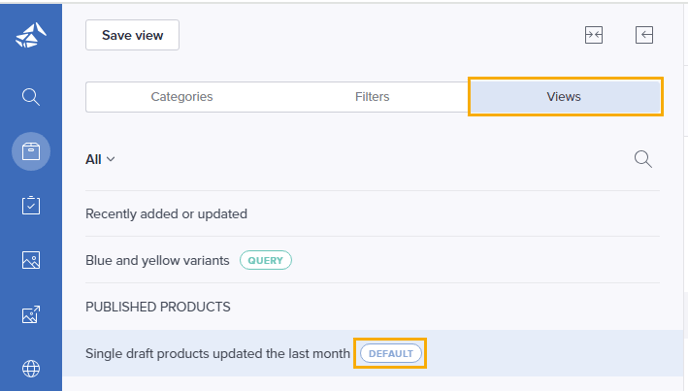
Go to the Views list to see your new view. If you selected to make this your default, you will see the Default label presented next to the view's name:
Edit a view
To make changes to a view, do the following:
- Make sure the correct filtering criteria are applied.
If no changes shall be made to the criteria as such, just select the relevant view from the Views list. - Click Save view from the upper left corner. The following window is presented:
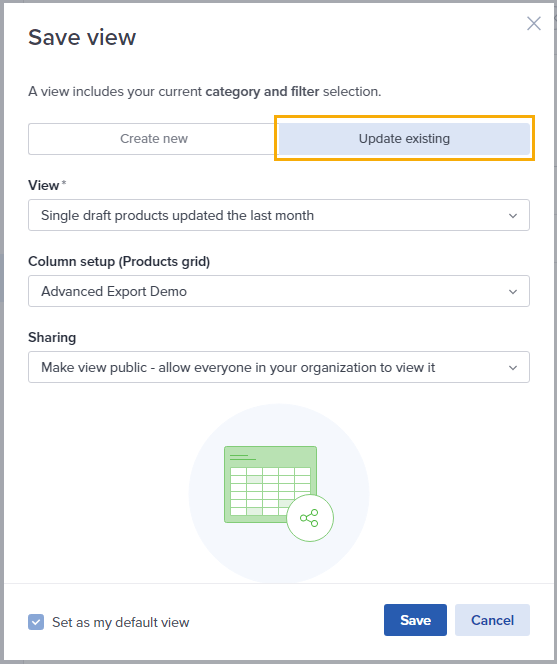
- Select Update existing.
- Select the View you want to update.
- Optionally update the Column setup, Sharing and Set as my default view settings.
Please see for details. - Click Save when you are done.
Share an existing view
As an owner of a view, you can Share it with given users or all users in your organization. Do the following:
- Click the 3-dots menu of the relevant view.
- Select Share. The following window is presented:
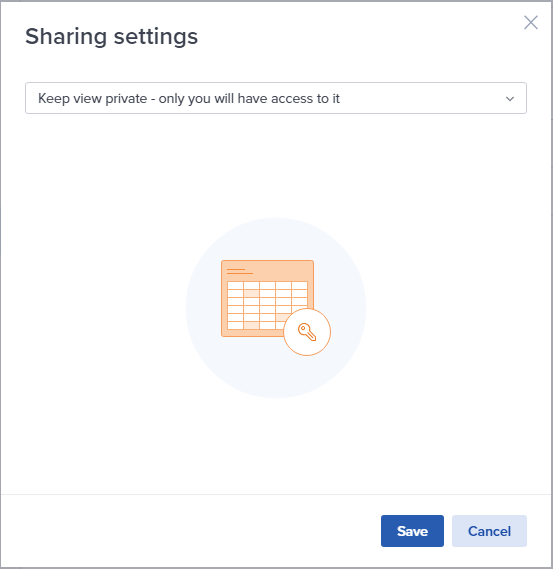
- Select who should be able to utilize this view by selecting one of the following options in the dropdown:
- Share with selected users
Select which users should be able to utilize the view, and give each user either View or Edit access. - Make view public
All users in your organization will be able to utilize the view. - You can also withdraw access to an already shared view by selecting Keep view private.
- Share with selected users
Set an existing view as default
Views created by other users can also be set as your default view. Do the following:
- Click the 3-dots menu of the relevant view.
- Select Set as default.
Rename a view
You can rename any view owned by you. Do the following:
- Click the 3-dots menu of the relevant view.
- Select Rename. The following window is presented:
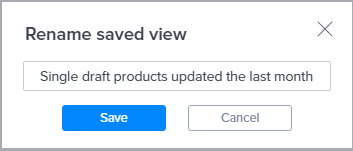
- Update the name and click Save.
The new name is now presented in the Views list.
Delete a view
You can delete any view owned by you. Do the following:
- Click the 3-dots menu of the relevant view.
- Select Delete. The following pop-up is presented:
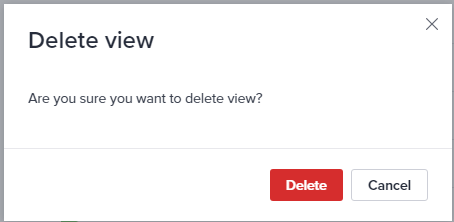
- Confirm removal by clicking Delete.
The view is no longer presented in the Views list.
Note: If you are a system administrator, you can delete any public saved view within your organization.