You need to have permission to edit assets to perform bulk operations.
Managed roles having access: System admin, PIM admin and DAM write.
Add to product Edit attributes Edit attributes with preview
Overview
After uploading your media, you can use bulk actions to process multiple assets at once, significantly reducing manual effort.
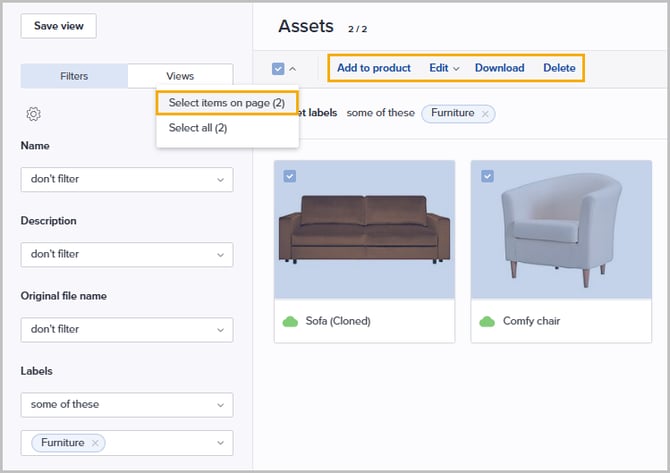
The bulk actions menu appears above the grid once a selection is made. Available operations depend on your selection method:
-
Manual selection: Selecting assets individually by ticking the checkbox on the tile, or using the 'Select items on page' function, grants access to the full suite of bulk actions.
-
Filter-based selection: Selecting all assets matching your current filters, grants access to a limited set of bulk actions.
Note:
We are currently expanding the support for large-scale operations. At this time, Edit attributes and Delete are the only actions enabled for "Select all" result sets. Additional operations will be available in future updates.

Tip! Please see Asset filters for information on how to set up criteria to locate relevant assets.
Add to product
Allows you to link/unlink products to/from the selected assets. Do the following:
- Select the relevant assets from the grid.
- Select Add to product from the menu.
The following window is presented: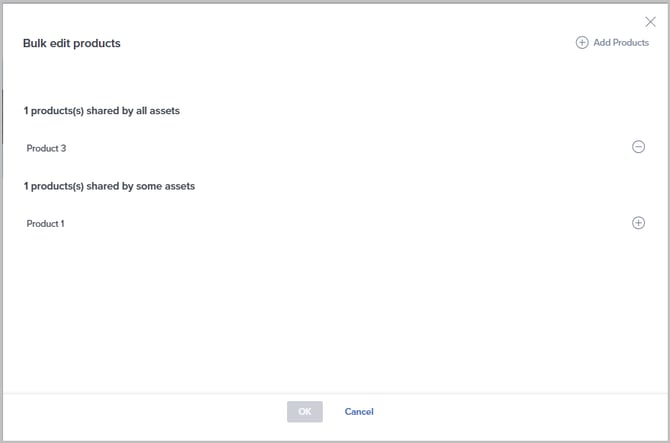
- Any products already linked to all selected assets are presented in the section at the top; [x] products shared by all assets.
- Any products already linked to at least one (but not all) selected assets are presented in the section at the bottom; [x] products shared by some assets.
- Link product(s) to all assets
If you want to link one/more products to all the selected assets, click Add Products in the upper right corner.
The following page is presented: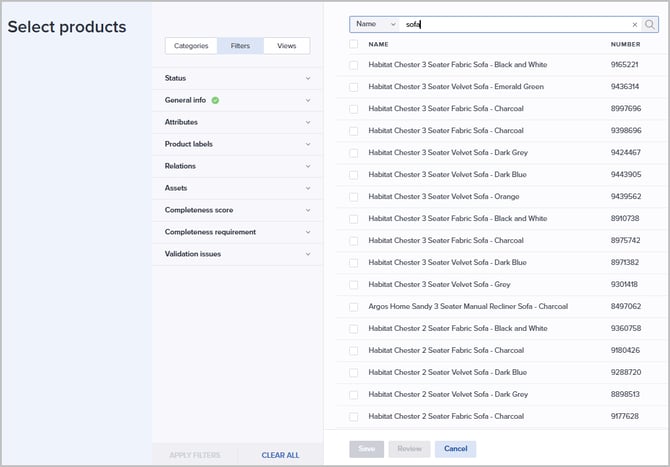
- Optionally use Categories, Filters or Views to find relevant products. You can also use the search function above the grid to for quickly locating products by name/number.
- Select all relevant products by ticking their checkboxes.
- Optionally click Review to inspect the list of selected products before saving. From the review window:
- Click Save if you are happy with your choices.
- Click Edit if you need to make changes to the list of products.
- Click Cancel if you want to cancel the whole process of adding products.
- Unlink product(s) from all assets
If you want to remove the link to a product currently linked to all selected assets, click the minus button to the right of the relevant product. - Link product(s) to remaining assets
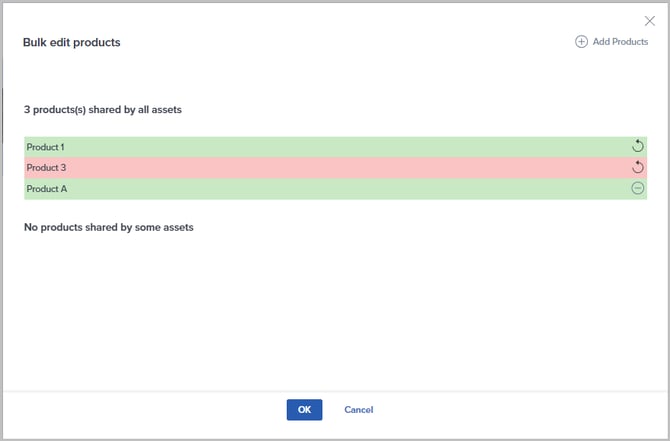
If you want to add a link to a product currently linked to some of the selected assets to the remaining set of selected assets, click the plus button to the right of the relevant product. - Review your changes. Rows highlighted in green indicate additions, while red indicates removals. In the following example:
- 'Product 1' (green): Was linked to some assets and is now being added to all. Click the arrow button to undo this change.
- 'Product 3' (red): Was linked to all assets and is now being removed from all. Click the arrow button to undo this change.
- 'Product A' (green): Is a new addition to all selected assets. Click the minus button to undo this change.
- Click OK when you are done.
Edit attributes
The 'Edit attributes' feature allows you to efficiently add/remove attributes or set/update attribute values to a large number of assets at the same time.
Do the following to perform one/more bulk edit operations on a set of assets:
- Go to the Assets page.
- Select the assets to be updated.
Tip! Please see Asset filters for information on how to utilize the Filters to locate the assets in question.
- Select Edit | Attributes: from the menu above the grid:

The Bulk edit attributes page is presented:
- Click the + icon in the upper right to add an operation.
- Select the relevant attribute. Start typing parts of the attribute name to filter the list.
- Select operation:
- ATTRIBUTE:
- Add attribute
To add the attribute to selected assets that do not have it assigned. Optionally, a value can be set at the same time. - Remove attribute
To remove the attribute for all selected assets .
- Add attribute
- ATTRIBUTE VALUE:
- Add value to existing
Only applicable to multi-select and dictionary attributes. The operation allows you to add more select values to the currently selected set of values. - Set value
To replace the current attribute value for all selected assets where the attribute is assigned. It can also be used to empty any existing values. - Remove value from existing
Only applicable to multi-select and dictionary attributes. The operation allows you to remove some values from the currently selected set of values.
- Add value to existing
- ATTRIBUTE:
- If applicable, specify/select a value (not relevant for 'Remove attribute').
- If applicable, add more operations by clicking the + icon again.
Note! Several operations can be performed on the same set of assets, but only one operation per attribute.

- If you added an operation by mistake, remove it by clicking the x icon to the right of the relevant row.
- Click Apply changes to [x] assets to execute the operation.
The bulk edit process will now start. It might take a while to finalize, depending on the number of assets and operations. You can follow the job's progress from the System monitor.
Edit attributes with preview
The 'Edit attributes with preview' feature allows you to update multiple assets simultaneously. To ensure accuracy, the system identifies and displays which attributes are shared across your selected assets, helping you make informed decisions before applying changes.
Note! This functionality is available for a maximum of 100 selected assets. For bulk editing of more than 100 assets, please see Edit attributes.
Do the following to add, set/edit the value, or remove attributes:
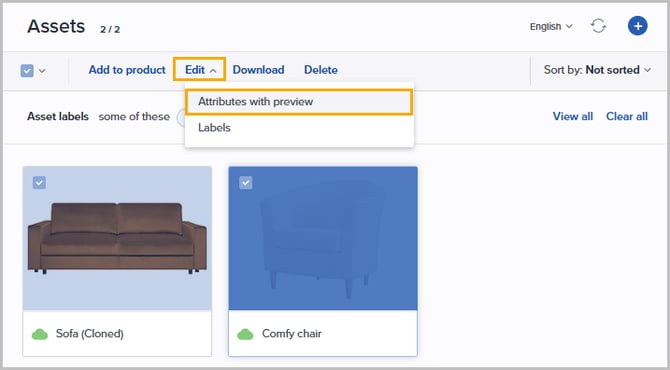
- Select the relevant assets from the grid and choose Edit | Attributes with preview from the menu above the grid:
Tip! Please see Asset filters on how to utilize Filters to locate the assets in question.
- The following page is presented:

The information is divided into the following sections. The number of attributes is presented in parenthesis for each section:
- Assigned to all assets
Lists the attributes assigned to all of the selected products. - Assigned to some assets
Lists the attributes assigned to some (one or more, but not all) of the selected assets. - Other attributes
Lists the attributes not assigned to any of the selected assets.
The Value column presents information about attribute values:
- Green icon
The value is equal or not defined for all assets with the attribute assigned. The value is presented. - Purple icon
The value is not equal for the assets with the attribute assigned. No value is presented.
- Assigned to all assets
- Optionally use the search function in the upper right corner to filter the listed attributes.
- Click the bulk edit checkbox for the relevant attribute(s).
Note: Any attributes you are not allowed to edit are listed but not available for bulk editing.
- Select operation:
- ATTRIBUTE:
- Add attribute
The operation will add this attribute to the selected assets that do not have it assigned.
If relevant, you can set a value at the same time. If the attribute is already shared by some assets and the current value is equal, this value is pre-filled. This is especially helpful when adding a text attribute.
If you don't specify a value, the assets already having the attribute assigned, will keep their value.Warning! Setting a value will override any existing value for all selected assets.
- Remove attribute
Will remove this attribute from the assets in your selection.
- Add attribute
- ATTRIBUTE VALUE:
- Add value to existing
Only applicable to multi-select and dictionary attributes. The operation allows you to add more select values to the currently selected set of values.
- Add value to existing
- ATTRIBUTE:
-
-
- Set value
The operation will replace the current value/set value for all selected assets where the attribute is assigned. It can also be used to empty any existing values. - Remove value from existing
Only applicable to multi-select and dictionary attributes. The operation allows you to remove some values from the currently selected set of values.
- Set value
-
- When all required operations are set, click Review to verify the asset selection and the operations to be performed.
- If you need to make changes, click Edit with preview to go back.
- Click Apply selected actions (x) to start the bulk edit operation.
The bulk operation process is executed immediately.
Edit labels
Do the following to add/remove labels to/from a set of assets:
- Select the assets you want to edit the labels for.
- Select Edit | Labels from the menu above the grid.
The following window is presented: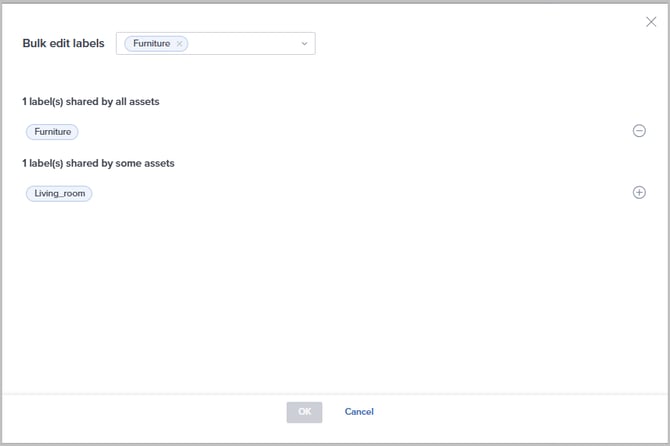
- Any labels already linked to all selected assets are presented in the section at the top; [x] labels shared by all assets.
- Any labels already linked to at least one (but not all) selected assets are presented in the section at the bottom; [x] labels shared by some assets.
- Assign existing label(s) to all assets
If you want to assign an existing label to all selected assets, click the input field at the top. Then type some letters to search and tick the checkbox for the relevant label. - Assign new label(s) to all assets
If you want to create a new label and assign it to all selected assets, click the input field at the top. Then type the name of the new label and select Add a new label. - Unassign label(s) from all assets
If you want to unassign a label currently assigned to all selected assets, click the minus button to the right of the relevant label. - Assign label(s) to remaining assets
If you want to assign a label currently linked to some of the selected assets to the remaining set of selected assets, click the plus button to the right of the relevant label. - Click OK when you are done.
Download
Do the following to download the selected assets to a zip file:
- Select the assets to be downloaded.
- Click Download from the menu above the grid.
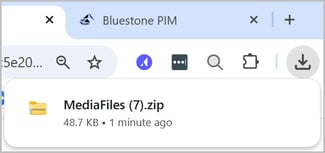
The download process is started immediately. - When the download process has finished, a notification is presented in your browser and the zip file can be found in the 'Downloaded' folder on your computer (Windows):
Delete
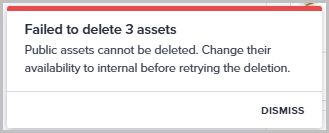
Only assets with Availability set to Internal or Automatic can be deleted. To delete a Public asset, you must first change its Availability to Internal."
Do the following to delete a selected set of assets:
- Select the assets to be deleted.
- Click Delete from the menu above the grid.
The following pop-up i s presented: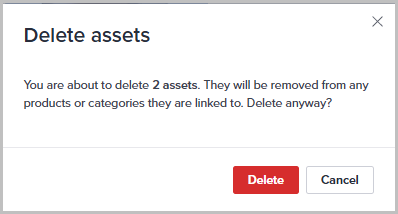
- Click Delete to confirm the operation.
- If any of the selected assets are Public, an error message will appear.: