You must be given explicit permission to manage catalogs and categories.
Managed roles having this permission: System admin, PIM admin and PIM write
Create a new catalog Add a new category
Edit a catalog/category Catalog/category details panel
Delete a category Archive a catalog Restore a catalog
Overview
For effective administration, it is recommended to invest time in designing the data model and constructing your catalog structure before populating it with products. Ensure the catalog structure aligns with your business needs and supports automated product management processes. It should accurately reflect your portfolio to facilitate efficient retrieval and maintenance of product information.
If you need assistance in defining the model, please contact us. We can provide guidance to help you get started with confidence.
Tip! You can establish multiple catalog structures that can be used for different channels.
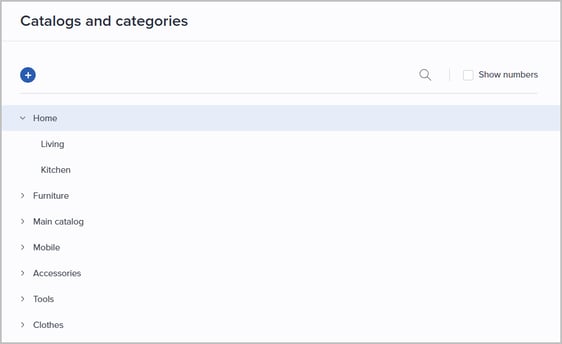
Go to Settings | Catalogs and categories to start building your structure or view/manage the existing hierarchy:
You can easily change the order of catalogs, or categories within a catalog, by using drag-n-drop:
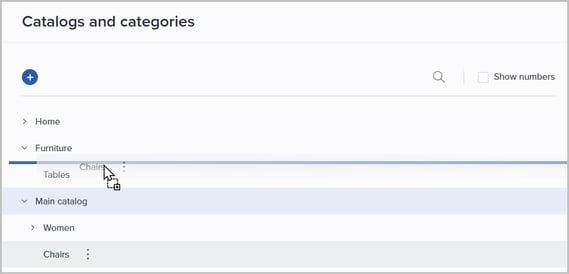
Note: A category cannot be moved from one catalog to another.
Search
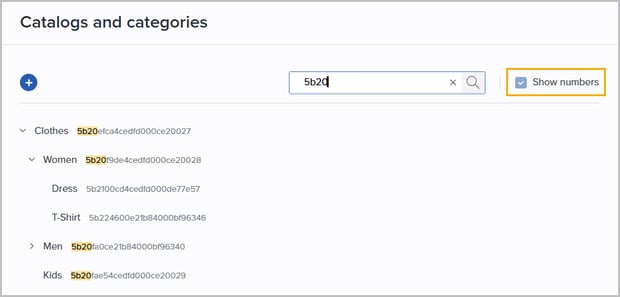
The search field allows you to quickly find catalogs and categories by name or number. Results are filtered to only show entries where a match is found, and matching strings are highlighted for easy identification.
By default, only category names are displayed. To show category numbers alongside names, select Show numbers on top.
Create a new catalog
Do the following:
- Click the plus icon (Add catalog).
- Specify a name:

- Press [Enter] or click the green checkmark icon to save.
- Select the catalog from the list to open the Details panel:

- If needed, update the Name or Number, or add a Description.
- Click Update settings when you are done.
Please see Add a new category on how to proceed with adding categories to your catalog.
Add a new category
Do the following to add a category to a catalog, or a sub-category to a category:
- Hover the relevant catalog/category.
- Click the 3-dots menu and select Add category.

- Specify a name:

- Press [Enter] or click the green checkmark icon to save.
Now the new category is presented in the structure. - Select the category from the structure to optionally change the Name or Number, or to add a Description.
- Please see Details panel for information about the different tabs.
- Click Update settings when you are done.
Note! Category numbers need to be unique across catalogs.
Edit a catalog/category
Catalogs/categories can be edited from Settings | Catalogs and categories or from the Products page.
Do the following to edit a catalog or a category from the Products page:
- Select Categories in the left panel.
- Hover the relevant catalog/category, and click the pencil icon (Edit):

- The Details panel is opened to the right.
- Update information as required. Please see Details panel for more information.
- Click Update settings when you are done.
Tip! Category-level attributes can be used to automatically assign attributes to every product within the category. See CLAs for details.
Catalog/category details panel
Details tab Category level attributes (CLA) tab Attributes tab
Assets tab Policies tab History tab
External assets tab Product sorter tab Rules engine tab
Details tab
The main information of the catalog/category is presented.
The ID is assigned by the system and cannot be edited. Edit the Name, Number and/or Description if needed. Click Update settings when you are done.

Click the arrow button (See products in category) to list all products assigned to this catalog/category in the Products grid.
Tip 1: Please see Product details panel, Categories on how to link a product to a catalog/category.
Tip 2: Please see Bulk edit categories on how to assign/unassign categories to/from a set of products.
Category level attributes (CLA) tab
You can manage product attributes collectively instead of individually by assigning CLAs to a catalog/category. This will promote consistency and save you a significant amount of time creating content for your products.

Please see Category Level Attributes for details on how to work with CLAs.
Attributes tab
You can enrich a category by assigning attributes to it. This will store information relevant to the category itself, and not affect the products within it.
Note: A maximum of 10 attributes can be added to each catalog/category.

- Add new attribute
Click the plus icon (Add attribute) to add one or more attributes to the catalog/category.
Assets tab
The Assets tab displays all assets currently assigned to the catalog/category. Assets provide supplementary information at the catalog or category level.
- Upload new asset
Click Upload new and assign.
The Add asset window is presented:
Drag-n-drop a file or click Select file to upload.Note: The maximum file size is 128MB.
Optionally give the asset a Name and Description.
- Assign asset from the library (DAM)
Click Assign from library:

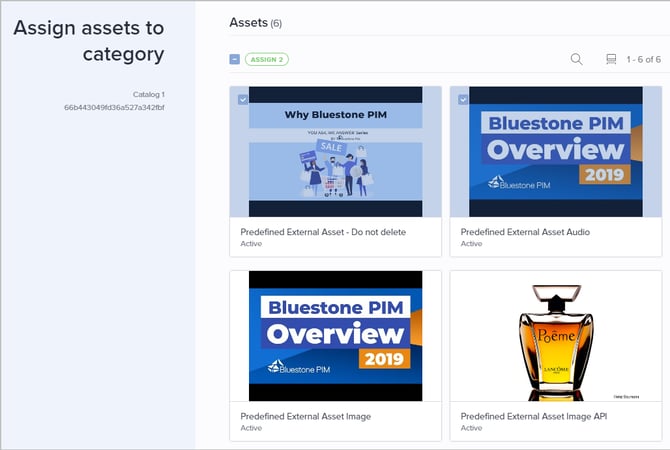
The Assign assets to category page is presented:
Use Filters/Views to find relevant assets.
Select the assets to be linked to the catalog/category, and click Save. - Download assets
You can download a single asset by clicking the 3-dots menu for the relevant asset, and selecting Download:
You can download all assets assigned to the catalog/category by clicking the Download all button:
- Unassign an asset
You can unassign an asset from the catalog/category by clicking the 3-dots menu for the relevant asset, and selecting Unassign:
Policies tab
If your organization has defined 'Restricted users', connected policies will decide which elements these users can access and interact with. If no policies are linked, no restricted users can access this catalog/category. Please see Assign permissions to a policy for more information.
You can restrict access to each catalog/category and/or the products residing in it by linking one/more policies.
- Before linking any policies, it can be useful to get an overview of which products reside in this catalog/category. Click the arrow button (See products in category) to view these products in the grid:

- You can restrict access For category and/or For products in category:
Click the plus button (Assign a policy) and select a policy. For each policy, you need to specify whether the users connected to this policy should have Read or Write access.
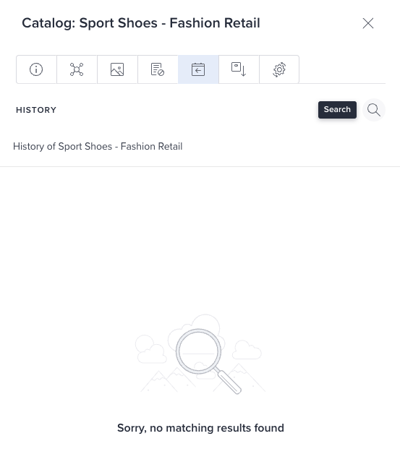
History tab
This tab provides a searchable log of all modifications made within the catalog or category.
- Use the search function to quickly locate specific changes or review the sequence of modifications.
External assets tab
If the External assets library has been made available for your organization, assets located outside of PIM can be assigned to a catalog/category.
- Click the pencil icon (Edit external assets) to assign one/more assets.

- In the 'Assign assets to category' page, you can search for relevant assets by clicking the magnifying icon. You can also view the assets in different ways by clicking the Change view type icon.
- Select one/more assets by ticking the checkbox for relevant assets:
- Click Review if you want to verify all changes before performing the operation.
- Click Save when you are done.
Please see External assets library for more information.
Product sorter tab
The product sorter helps you organize products within a chosen catalog or category.
Note: Sorting will automatically be disabled if there are more than 500 products in the relevant catalog/category.
Do the following to define the order of products residing in a category:
- Click the Activate sorting button or the toggle in the upper right corner to activate sorting:

The products residing in the catalog/category are now presented:
-
Move the position of a product by using drag-n-drop:

Rules engine tab
You can access the Rules engine tab if you have the Rules engine read, Rules engine write or Plugin admin role.
Products can be automatically assigned (and unassigned) to this catalog/category based on defined rules. These rules are set up and maintained in the Rules engine plugin.

The following actions/options are available:
- Create a new rule by clicking the plus button (Add new rule) in the upper right corner. This operation will route you to the Rules engine plugin. The 'Action', 'Context' and 'Target' will be pre-filled based on your current selections. Please see Assign to category for further details.
- Once a category assignment rule is created, it is listed in the Rules engine tab. Hover a rule and click the 3-dots menu to access the following actions:
- Activate/Deactivate
- Edit
- Duplicate
- Delete
Tip! Explore more automation possibilities by utilizing the Rules engine here.
Delete a category
Categories can be permanently removed.
Caution: It's not possible to restore a deleted category. All sub-categories will also be deleted. Assigned products will not be deleted, but will lose their link to the deleted catalog/categories.
Do the following to delete a category:
- Go to Settings | Catalogs and categories.
- Click the 3-dots menu next to the relevant category and select Delete:

- Click Delete in the pop-up to confirm removal.
The category is now permanently deleted.
Archive a catalog
Catalogs can be archived and later restored if needed. It's not possible to permanently delete a catalog.
Caution: All categories inside the catalog will also be archived. Assigned products will not be deleted, but will lose their link to the archived catalog/categories.
Do the following to archive a catalog:
- Go to Settings | Catalogs and categories.
- Click the 3-dots menu next to the relevant catalog and select Archive.

- Click Archive in the pop-up to confirm archiving.
Restore a catalog
Archived catalogs can be restored by using the API. The category/subcategory structure and any category level attributes (CLAs) will also be restored. Links to previously assigned products were removed upon archiving, and can therefore not be restored.
See Public API reference for more information.
Sync catalogs and categories
You can sync catalogs and categories independently of products - this is especially useful for establishing or updating the structure in external systems.
Do the following:
- Go to the Catalogs and categories page.
- Click the Sync button in the upper right corner. Information about the latest (pending/in progress/completed) sync sessions is presented:
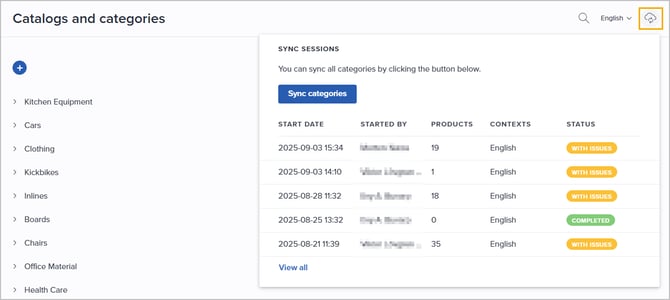
Tip! Click View all to go to the System monitor for viewing details about all pending/in progress/completed sync sessions.
- Click Sync categories.
- If your organization has more than one context, select one/more Contexts to sync category data for.

- Click Sync to start the session.
Note: Depending on other sync sessions and the number of categories included in the sync, new/updated information might not be immediately available in PAPI.
You can follow the progress of and view the sync report for the sync session from the System monitor.
Do the following:
- Go to the System monitor and find the relevant Sync entry:
- Click the sync session you want to inspect. The details panel is opened:
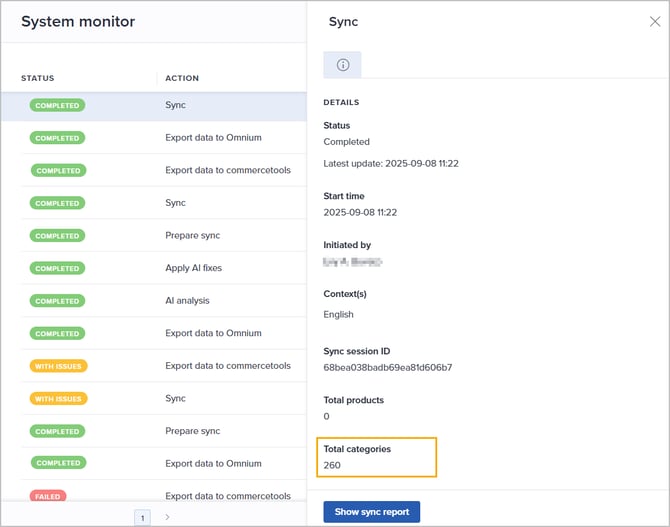
- Click Show sync report to view details about the sync. The following page is presented:

- Click Close when you are done.